


Ever come across someone’s Instagram feed that is perfectly pieces together – flowing from one image to the next – like a puzzle? Well guess what… there’s an app for that of course! In this blog post we’ll take you step-by-step through the process for how to create an Instagram puzzle grid with Canva instead of having to use Photoshop.

STEP 1 – Create your single graphic
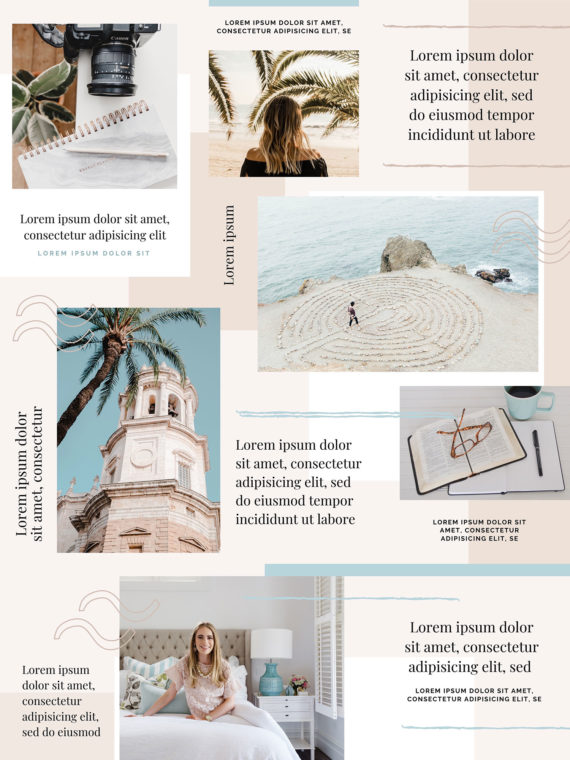
Before we slice the image up into individual tiles to post into Instagram, you first need your main design ready to go. You can either purchase a predesigned Canva template like the one you see below, or create your own. We HIGHLY recommend doing this part on your the desktop version of Canva and not your phone – it will be much easier.
If you choose to purchase a pre-made Canva template for this the creator should have already designed it so it will slice up in the right places. Just update the template in Canva by the changing colors, font, dropping in your own photos and updating all filler text to have your own message or quotes written on the entire image.
If you decide to create your own just be careful where the image will be sliced so any paragraphs of text are not cut off by accident.
To create your own make sure you use the image size suggestions below. This will ensure each individual image after the puzzle is cropped will be the standard 1080×1080 IG approved size.
IMAGE SIZE FOR 9 IMAGE GRID (3 IG rows) = 3240 x 3240 pixels
IMAGE SIZE FOR 12 IMAGE GRID (4 IG rows, same as example shown in this blog post) = 3240 x 4320 pixels
Step 2 – Download the Image & Get it Onto Your Phone
Once the full template/design is complete download it from Canva onto your computer. There are a few ways to get the image to your phone from your computer.
OPTION 1: Email the image to yourself. Open your email on your phone and download the image from there to your camera roll.
OPTION 2: If you have a Mac/iPhone you can use AirDrop to transfer the images from computer to phone.
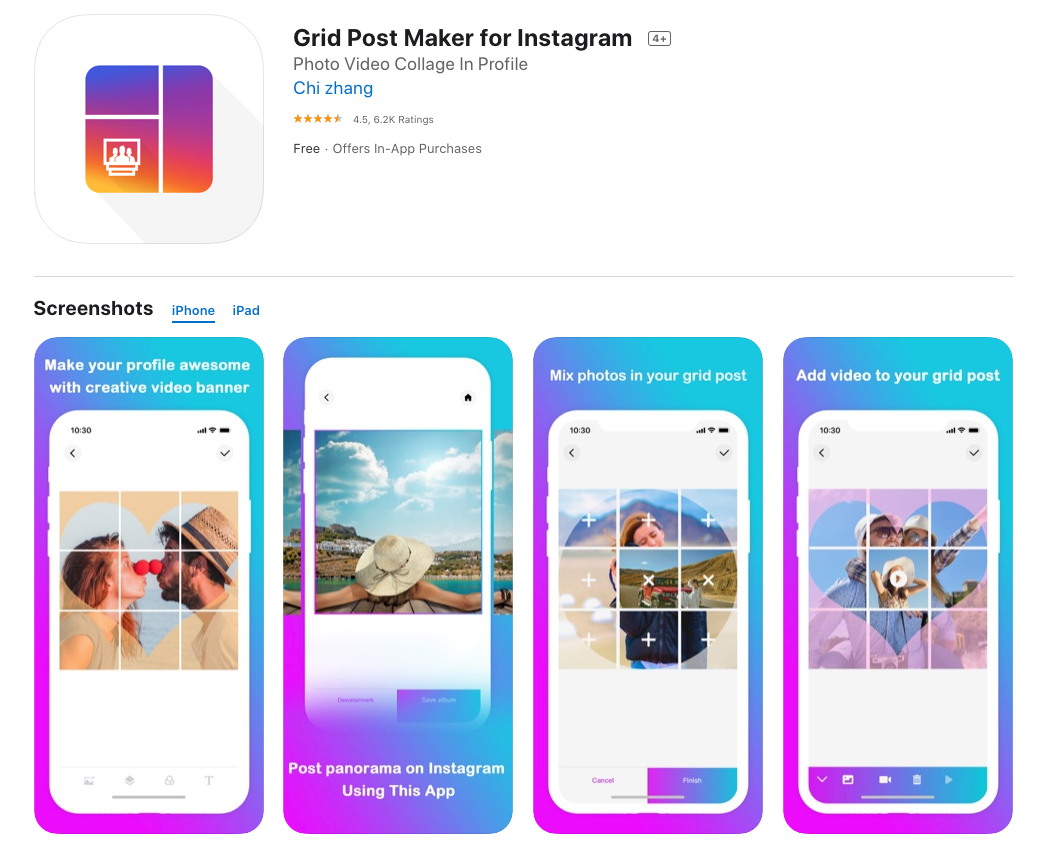
Step 3: Get the Grid Post Maker App
The Grid Post Maker app is a free app you can install on your phone, but honestly it’s just worth paying the $6 to have it for life because the ads on the free version are really annoying.
Step 4: Upload your puzzle image and go through the App steps
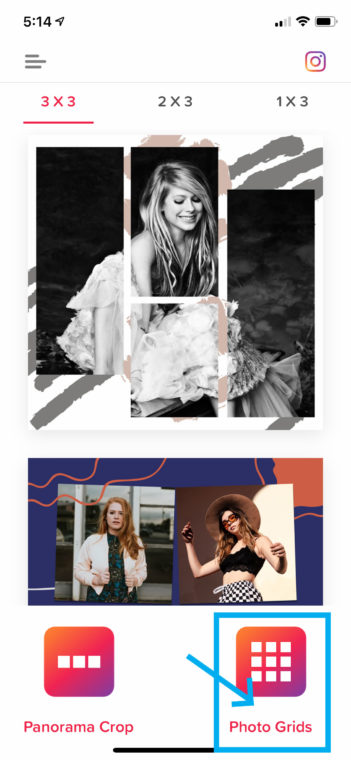
After you open the Grid Post Maker app select the option for Photo Grids.
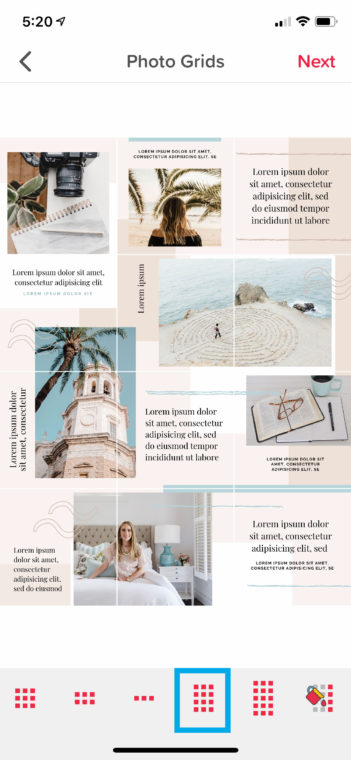
Next depending on the size of IG puzzle you’ve created you can choose the 3 row grid or the 4 row grid. If you’re using the template shown in this blog post example you will want to select the 4 row grid indicated below.
From there the app will take you through a few editing steps. If you want to not edit the image and keep it as-is just keep clicking Next/Done as you go through those steps. Otherwise you’re able to add on extra elements and filters if you choose. If you’re on the free version you will have to wait through an ad for each step here (Yep, annoying. That’s why we just upgraded the app for the 1 time $6 fee).
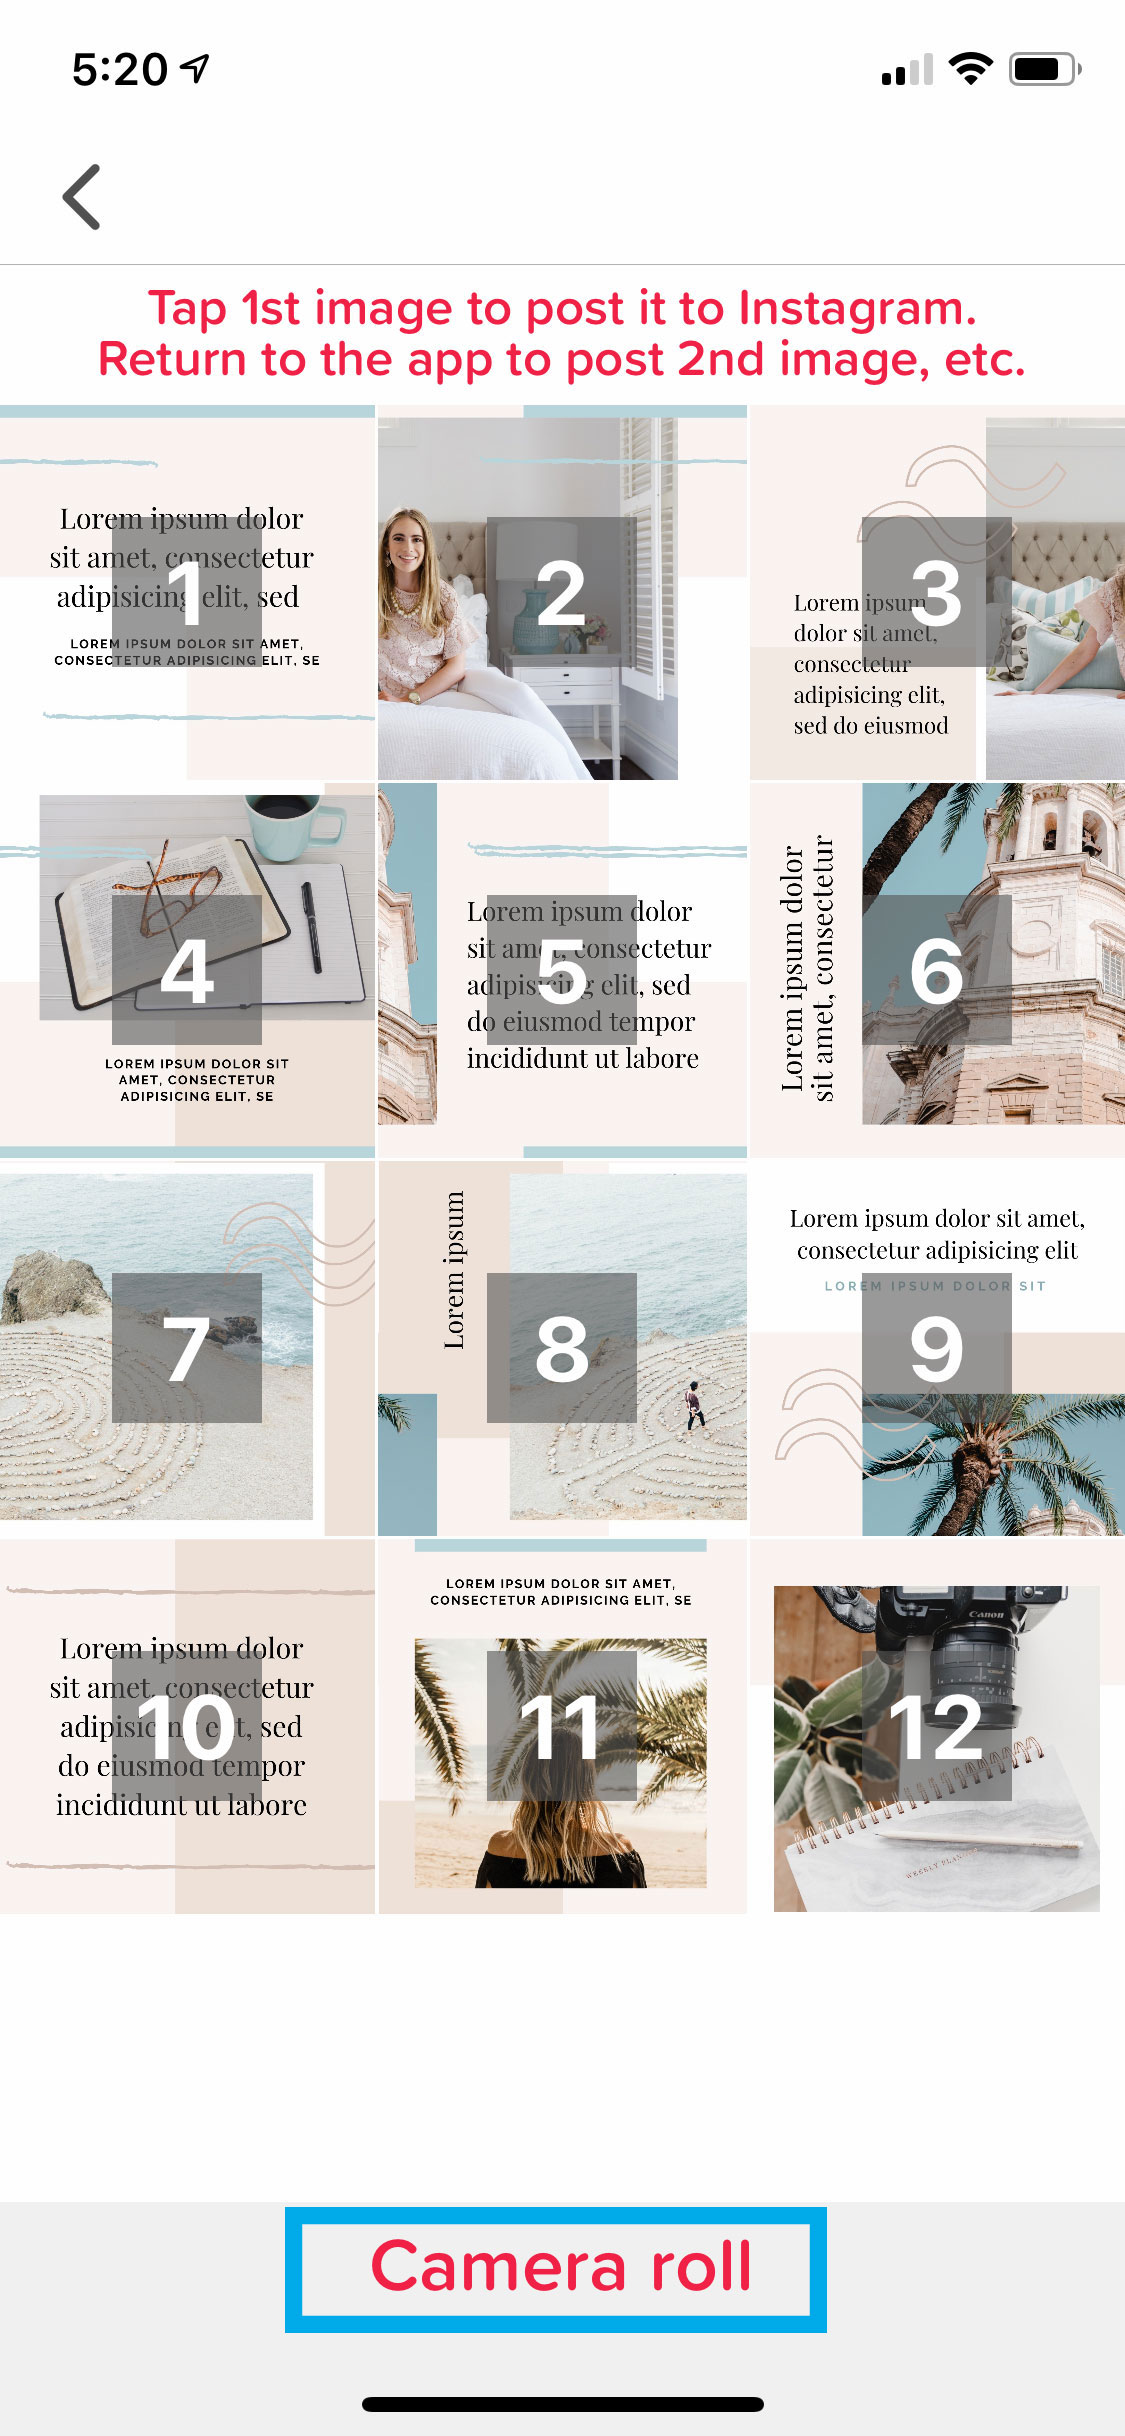
Once you’re finished with those steps you will end up on a screen that look similar to this screenshot below. To add all cropped images to your phone click the Camera Roll button at the bottom. Otherwise you can follow the screen’s instructions and 1-by-1 post them to Instagram in the order down on the screen.
If you choose to download them all to your phone first you still want to post them in the order shown on the screen so the images correctly connect to each other once they are all posted.
You’re done! You can then continue to use these designs over and over again by replacing the images/writing again and following all steps.


